

Step 1. Sign up and Activate Your Account
If you haven't done this, you can do from the main page.
Step 2. Install Your Pixel Code
To link your website to Vouchkick, and subsequently display your widgets (we call them "Kits") on your website, you need to install this code snippet on your website.
This should take less than 60 seconds to do. There are a few ways to do it. Just click the option that best works for you.
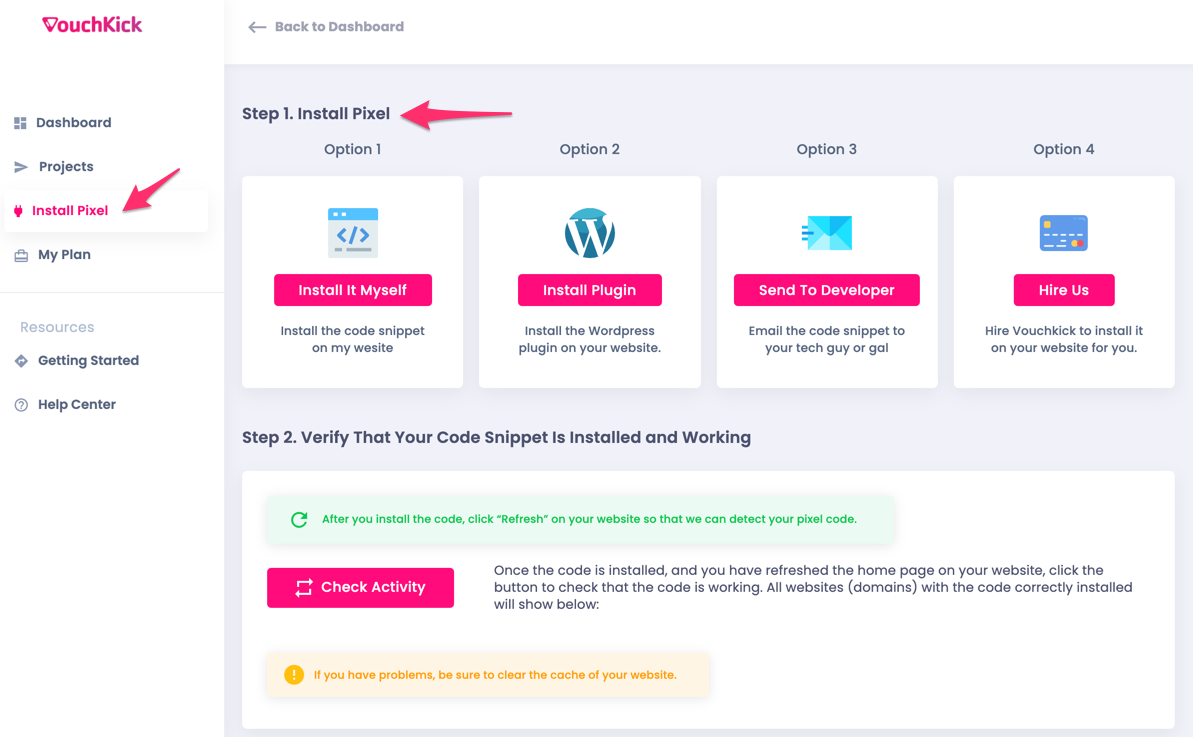
You can find the wordpress plugin here.
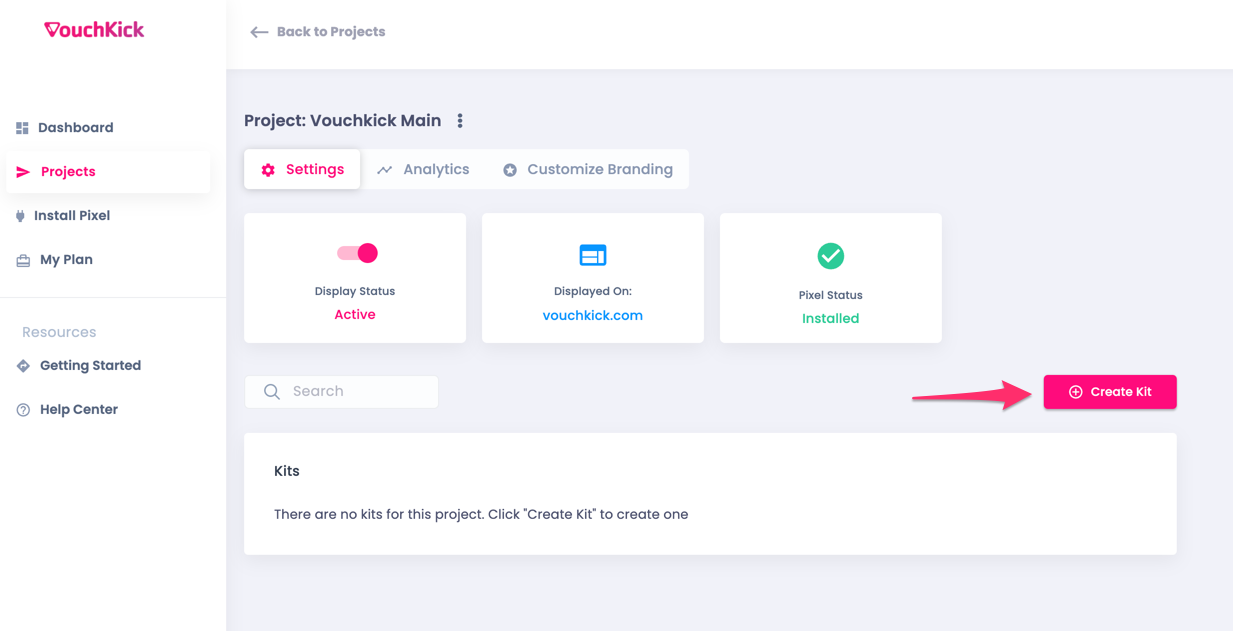
Step 3. Create Your First Project
Click the “Create Project” button to create your first project.
A project contains “Kits”, which are the widgets that you create for your site. Projects are generally grouped under a specific website or domain.
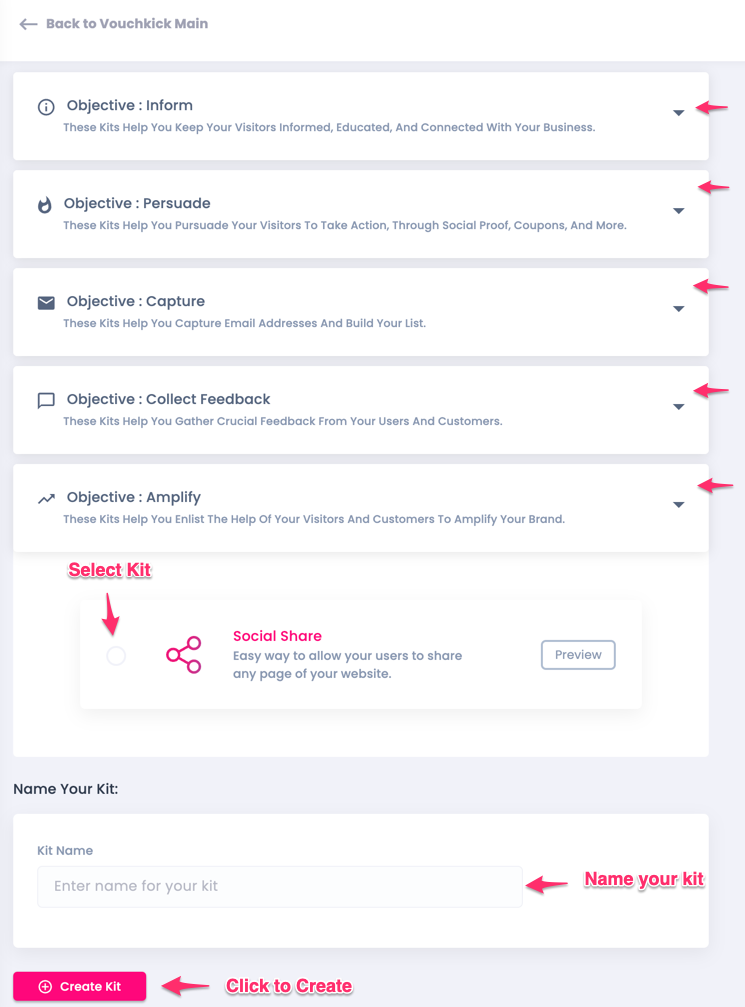
Step 4. Customize and Launch Your Kit
Next, customize your kit to match your needs. Make sure the display status is Active, in order for it to show live on your website.
Choose 'Where' You Want to Display Your Kits
Each kit can be customized to display on any combination of pages you want. Display kits as an overlay on top of the page, or use our Embed Tool to place your kits inside a page, next to any elements you want.
Choose 'When' You Display Them
Trigger your kits to display at the exact moment that will result in a high conversion rate to a sale. Endless customization options available.
Personalize To Match Your Brand
Every kit can be customized to match your brand colors. Use our beautiful icon library, or upload your own custom images, logos, or icons.
Connect
Connect your kits to 1,100+ apps to automate actions, notifications, conversions, and more. Send data to Vouchkick or send collected data to your other apps. Unlimited integrations with webhooks.
Analyze
View detailed analytics to help you test and optimize for better conversions and more sales.